In the world of home renovation, few transformations feel as timeless as unveiling the raw beauty of a brick wall. Whether you're stripping away years of outdated plaster to reveal industrial charm or prepping for a fresh coat of paint, knowing how to remove render from brick can breathe new life into your space. At Tasteful Space, we've helped countless homeowners achieve that perfect balance of rustic elegance and modern comfort through thoughtful brick restoration projects. But before you grab your tools, let's dive into the why, how, and what-ifs of this essential DIY task. Done right, it enhances curb appeal and boosts property value; done wrong, it risks damaging your masonry. Ready to get hands-on? Here's everything you need to know.
Why Consider Removing Render from Brick?
Render, that smooth cement-based coating often applied to exterior or interior brickwork for weatherproofing, can crack and peel over time, trapping moisture and leading to efflorescence—those unsightly white salt deposits. Internally, it might hide the textured allure of exposed brick walls, a staple in contemporary designs we adore at Tasteful Space for their warmth and versatility.
The decision to remove render from brick often stems from aesthetic desires. Imagine transforming a bland kitchen backsplash into a focal point that echoes the cozy vibe of a loft apartment. Technically, old render can compromise breathability; bricks need to "breathe" to prevent damp issues. If your walls show bulging patches or discoloration, it's a sign. Environmentally, exposing the brick reduces the need for synthetic coverings, aligning with sustainable home upgrades. Just weigh the effort against the payoff—sometimes, a professional assessment reveals if partial removal or re-rendering is wiser.
The Benefits of Exposing Your Brick Walls
Beyond the visual punch, stripping render uncovers durable, low-maintenance surfaces. Exposed brick acts as a natural insulator, potentially lowering energy bills by regulating indoor temperatures. In humid climates, it wicks away moisture better than sealed render, curbing mold growth—a common headache in older homes.
From a design perspective, this process opens doors to creative finishes. Pair reclaimed bricks with sleek cabinetry for that Tasteful Space signature: understated luxury. Studies from the Brick Industry Association highlight how authentic masonry adds up to 10% resale value in urban markets. Plus, it's forgiving for imperfect walls, masking minor cracks that paint can't. If you're blending styles—say, farmhouse with mid-century—exposed brick bridges eras effortlessly. The key? Patience during removal ensures the integrity of each row, preserving the wall's structural whisper.
Tools and Materials for Effective Brick Cleaning
Tackling remove render from brick requires precision, not brute force. Start with basics: a stiff-bristled nylon brush for loose flakes, chisels (cold and toothed) for stubborn spots, and a hammer for controlled tapping. Power tools like angle grinders with diamond blades speed things up but demand steady hands to avoid gouging.
Protective gear is non-negotiable: dust masks (N95 or better), safety goggles, gloves, and knee pads. For chemical aids, opt for eco-friendly render softeners like citric acid solutions over harsh acids that etch brick pores. Drop cloths, tarps, and a shop vac keep debris in check. At Tasteful Space, we recommend investing in a quality wire wheel attachment for drills—it's gentler on vintage bricks than aggressive scraping. Budget $50–150 for a full kit; reusable items pay off across projects.
Step-by-Step Guide to Remove Render from Brick
Embarking on this journey? Begin in a well-ventilated area, ideally outdoors or with fans circulating air. First, assess: tap the surface gently. Hollow sounds indicate delamination—prime for removal.
Step 1: Preparation. Score edges with a utility knife to create clean break lines, preventing random chipping. Wet the wall thoroughly; damp bricks flex under stress, reducing fracture risk.
Step 2: Loosening the Render. Apply a render stripper if needed, letting it dwell 15–30 minutes. For mechanical methods, use a chisel at a 30-degree angle, working in small sections (2x2 feet). Strike lightly—think surgeon, not demolition derby. Alternate with brushing to lift softened layers. If power tools tempt, set grinders to low RPMs; over 5,000 can overheat and spall bricks.
Step 3: Deeper Removal. For thick applications, employ an oscillating multi-tool with a scraper blade. Patience here is your ally; rushing invites mortar joint damage. Vacuum frequently to monitor progress and avoid re-contaminating cleaned areas.
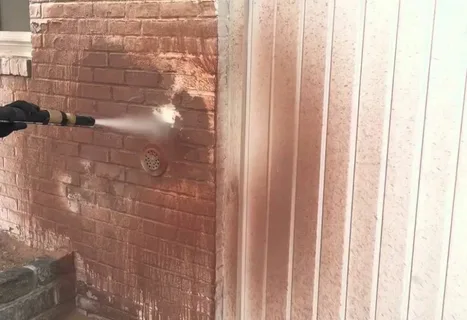
Step 4: Cleaning Up. Once bare, hose down gently—no high pressure, which erodes soft mortar. Scrub with a baking soda paste for residue, then rinse. Allow 48 hours to dry fully.
This phased approach, honed from Tasteful Space's restoration workshops, minimizes dust and maximizes results. Expect 4–8 hours per square meter, depending on render age.
Essential Safety Precautions During the Process
Brick work isn't glamorous, but safety keeps it from turning hazardous. Silica dust from render is a lung irritant—always mask up and wet-dry vac instead of sweeping. Secure ladders firmly; uneven brick can shift under weight. If using chemicals, neutralize spills immediately to protect nearby plants or flooring.
Electrically, unplug tools during blade swaps. For pros like our Tasteful Space team, we add ear protection against grinder whine. Hydrate often; it's sweaty labor. If asbestos suspicion looms (pre-1980s homes), halt and test—health trumps haste.
Post-Removal Care for Lasting Brick Beauty
Freshly exposed? Seal with a breathable silicate-based product to guard against stains without trapping moisture. Re-point loose mortar with lime-based mixes for authenticity—cement is too rigid for historic bricks.
Regular dusting maintains the patina; avoid pressure washing annually at most. At Tasteful Space, we finish with subtle lighting to accentuate texture, turning walls into art. Monitor for cracks; early fixes prevent water ingress.
Elevate Your Space with Expert Guidance
Mastering how to remove render from brick unlocks a canvas for personalization, but it's not without pitfalls. If your project involves load-bearing walls or extensive damage, consult pros—our Tasteful Space specialists blend technical know-how with design flair to ensure seamless integration.
From cozy nooks to statement features, exposed brick embodies enduring style. Ready to transform? Reach out to Tasteful Space for tailored advice or hands-on help. Your dream interior awaits—just one layer away.