Introduction
A crimping tool may seem like a small, simple hand tool, but its impact on electrical, networking, and mechanical work is huge. From professional electricians to DIY enthusiasts, this tool transforms wires, connectors, and cables into secure, reliable connections. Understanding its uses, types, and proper techniques is key to achieving safety and efficiency in any project.
What Is a Crimping Tool?
At its core, a crimping tool is designed to compress or deform a connector around a wire to create a tight, secure connection. Unlike soldering, crimping doesn’t require heat, making it faster and often more durable in many electrical and mechanical applications.
Why It Matters
-
Ensures reliable electrical conductivity
-
Prevents loose or exposed wires
-
Saves time compared to traditional joining methods
Whether you’re connecting network cables, automotive wiring, or industrial connectors, a crimping tool is often indispensable.
Types of Crimping Tools
Crimping tools are specialized depending on their use. Here are the main types:
1. Electrical Wire Crimpers
Used for connecting wires to terminals, these tools are common in household and industrial wiring. They often have multiple notches for different wire gauges.
2. RJ45/RJ11 Network Crimpers
Designed specifically for network cables, these tool crimping attach modular connectors to Ethernet and telephone cables. Many also have a built-in cutter and stripper for convenience.
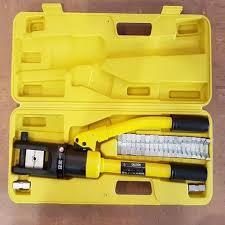
3. Hydraulic Crimping Tools
Ideal for heavy-duty applications, such as large electrical cables or industrial projects. These tools use hydraulic pressure to create extremely strong crimps.
4. Insulated Terminal Crimpers
Designed for terminals with protective insulation, ensuring both secure connections and user safety.
How to Use a Crimping Tool Properly
Using a crimping tool correctly is critical to achieving a strong and safe connection. Here’s a step-by-step guide:
-
Select the Right Connector: Match the connector size to the wire gauge.
-
Strip the Wire: Remove just enough insulation to fit the connector—usually around 1/4 inch.
-
Insert the Wire into the Connector: Ensure all strands are inside.
-
Place the Connector in the Crimping Tool: Use the correct slot for tool crimping your wire size.
-
Squeeze Firmly: Apply even pressure until the crimp is complete.
-
Check the Connection: Tug gently to ensure the wire is secure.
Benefits of Using a Crimping Tool
Efficiency and Speed
Crimping is faster than soldering or twisting wires, saving time on complex wiring projects.
Durability
Properly crimped connections resist vibration, corrosion, and wear, making them ideal for automotive and industrial use.
Safety
Crimped connections reduce the risk of exposed wires, shorts, or electrical fires.
Versatility
From small electronics to heavy-duty cables, crimping tools handle a variety of applications.
Tips for Choosing the Right Crimping Tool
-
Check Wire Compatibility: Ensure the tool supports the wire gauge and type you’re using.
-
Look for Ergonomics: Comfortable grips reduce hand fatigue, especially in prolonged projects.
-
Consider Multi-Function Tools: Some crimpers also cut and strip wires, increasing convenience.
-
Evaluate Build Quality: Strong materials and precise jaws result in consistent crimps.
-
Budget vs. Longevity: Investing in a professional-grade tool often saves time and frustration.
Final Thoughts: Why Every Workshop Needs a Crimping Tool
A crimping tool is more than just a hand tool—it’s a cornerstone of reliable connections in electrical, networking, and mechanical work. By understanding the right type, proper technique, and practical applications, anyone can achieve professional-grade results. Whether you’re wiring a home, setting up a network, or maintaining industrial machinery, the crimping tool ensures every connection is strong, safe, and lasting.
For the Information: Click Here